|
|
Post by Rebekah on Jul 26, 2014 12:45:02 GMT -5
Terrific info, mach12. Thank you so much. I'm really not too bothered about the discolouration to the pan - my big concern was that the fact that I could feel a ridge where the soda had etched the surface of the lower portion of the canner, and that its ability to hold pressure might have been compromised. Nice to know that someone else here has a connection to repurposed cast iron!! A pizza 'stone'. I like that idea!! I wondered about using it in the bottom of the Twell for a baker base. After all, that's what's at the bottom of the oven. |
|
|
|
Post by vaporvac on Jul 26, 2014 13:45:19 GMT -5
I'm really sorry about your canner; I would think it's quite thick and maybe if you use it to boil water you can see if there was any pinholing that went through. Unfortunately, the instructions posted were only a small bit of the original. I've had quite a few posts on the subject and gave a caveat about aluminum in at least one of them. I also post on two boards, so it's sometime hard to keep track of what's been written where. It's nice to have another reminder. I also recommended seasoning them with Crisco in the oven after an initial drying. I did mine twice, along with anything else that was cast iron. The Baffle came out great. If yours has rust and you don't intend to reporcelain I would recommend seasoning it.
I've boiled out burners for four stoves and never had mine look like yours. Are you saying that's a result of the interaction with aluminum? I used washing soda as that's what Chambers recommended using and others used with success. I boiled them in a disposable lasagna-type pan. I thought I'd have to replace it, but it's held up through all the restorations thus far. I guess it's hard to account for all the variables, but I feel bad about the pan. I've had a Dansk enameled cast iron pot ruined from boiling water! The minerals totally destroyed the finish. Only later did I read that's possible. It looked really similar to your burners, in fact. If only I had a remedy for it.
Wagner #8? is the perfect size cast iron griddle for the Chambers. The old stuff is light weight;great if you can find it (and afford it), but still probably too heavy to use the lifting mechanism. Many of us have bought the Nordicware teflon griddle which is also a perfect fit, but only for lower temp cooking. I use the aluminum original for roasting veggies, etc as I can use both the griddle AND grill. I love that feature of the original. I'd love to see a pic of the family tub griddle.
Mach12,thanks for the tip on cleaning aluminum. I had the same thing happen as bekah, but from tsp (or maybe it was automatic dishwashing powder).It was an old Wearever aluminum stockpot, so not as thick as a pressurecooker. It doesn't leak, but looks like heck.
|
|
|
|
Post by melissaf on Jul 26, 2014 15:03:12 GMT -5
I also found the rattle culprit. It resembled a nail without a head (on the left of the picture - I used the open hair pin to wiggle it free), and fit the burner ports perfectly. My guess is that someone tried to clean the heads, and lost this bit inside. I think those are support rods used in the casting process. I'm working on an A and a B with this style burner and all 6 of my burners had the same rod rattling around inside. You've done an excellent job with your restoration and I know all of your documentation is going to come in very handy when I start putting my A back together! |
|
|
|
Post by pooka on Jul 26, 2014 15:42:55 GMT -5
Great work. Your detailed work will help future owners answer lots of head scratching questions. The first model As & the model 7141 like mine had cast iron griddles if you could get ahold of one. This is what mine looks like.  I believe an old number 8 Griswold griddle will fit. Some other member have gotten after market cook-top griddles. A Nordic Ware Reversible Griddle I think. It's the closest in size. |
|
|
|
Post by mach12 on Jul 26, 2014 19:44:38 GMT -5
Caustic solutions raise heck with aluminum and most people either figure it out the hard way or get off easy by seeing someone learn it the hard way. We had a guy in an engine rebuild shop I used to work in who just didn't get it. First he put an engine in the dip tank (which was basically a TSP solution) and left all the aluminum data tags and plates on it. He took it out after an hour and got all upset because he thought someone stole the tags and plates. Then he decided to put all of his aluminum parts in the tank to clean them. The tank was the size of a small dump truck bed so you put stuff on a hook or chain and lowered them into the tank. When he raised the hook there was nothing there except a bare, clean steel hook. He still thought people were messing with him even though he had been told and told and there were signs all over in the tank room saying not to put any aluminum in the tank.
The Eagle 1 etching wheel cleaner is great stuff and a common trick used in auto restoration and detailing. When I do a show engine with oxidized aluminum I brush off the heavy oxidation with a brass wire brush, the clean with the wheel cleaner, rinse, then clean with a soapy steel wool pad. If the car is a daily driver that's usually good and looks as good or better than new. If it's for show I then buff it on a buffing wheel using buffing compound and it almost puts chrome to shame. The first piece of cookware I did was a pressure cooker that my mother got as a wedding present in the 40's. Brought her to tears and she refused to ever use it again so that it didn't get messed up. My dad bought her a new one and gave me strict orders not to clean it up.
I don't know a lot about restoring Chambers ranges yet but am finding some good uses for the stuff I know about vehicles and equipment as I go. Another one I just tinkered with is polishing the porcelain enamel tops of my A series using windshield polish and a buffer. I did one small area just to test it and man did it clean it up! I plan to do the whole top as soon as I can get to it and will post pictures but here in the Pacific Northwest we have to maximize our use of sunny weather and I have too many outbuildings needing repair and roofing, a deck that needs to be refinished and on and on. I probably need to hire someone to help me with my retirement projects but something seems kind of haywire about that idea.
|
|
|
|
Post by Rebekah on Jul 26, 2014 21:39:59 GMT -5
Oh my goodness. The story about your colleague in the shop was funny. I had lined a small aluminum baking tin with wax paper and poured my lye soap in some years ago. Was pretty bummed to find that the base, while very shiny, was awfully pitted. I just didn't think of washing soda as being that causic. I mean ... I add it to my boiled-down soap to make our laundry detergent! But there you go. I had considered using the compound with a wheel on my griddle to get it up to the factory shine ... but then had second thoughts about using the stuff on an eating surface. There was a section that had some etching (perhaps the rodent needed a potty break after tearing up the instructions?) but gradiating from abrasive pads to a wet paper provided enough of a shine to make me happy, and the first attempt at cooking was delightful. Thanks again  |
|
|
|
Post by pooka on Jul 27, 2014 4:18:44 GMT -5
I'd like to see how polishing the top with windshield polish turns out. My little stove had a white haze to it when I first got it. Soap & water won't touch it. I think it's partly mineral deposits from water boil overs, & partly etched from abrasive cleaning. The other side of the top around the broiler shine. I guess it didn't get as much abuse as the rest of the top.I tried a little MAAS polish in a spot without much affect, but I didn't use a buffer. MAAS polish has jewelers rouge in it, so I thought it might work. I might have had better success if I had used a buffer. The haze went away after it started to get bacon grease wiped around on it. I just don't clean it too vigorously. I'd like to have a better solution than just keeping it greasy. She's in such good original condition, I'd rather try finding ways to maintain her & not redo her. The rest of the porcelain is almost perfect with only two chips.
|
|
|
|
Post by mach12 on Jul 27, 2014 8:59:31 GMT -5
Pooka, I'll try to get to the polishing but have kind of put the restoration of the A on hold while I look for the broiler linkage parts. I figured I'd be more likely to remember how things go back together if I waited, especially if it took a long time to find the pieces. I was reading through some old posts and there were some comments about how porcelain enamel was basically glass on metal and the light came on so I took an old piece of porcelain and hit it and it really did a nice job so then did a small area on an edge of the top of my A. It sounds like yours is the same issue. Mine has a white hazy buildup that looks like minerals cooked onto the top and my hope is to buff that off. Since mine came from California and knowing the water there I'm not surprised to see it. I use a windshield compound that comes in fine and regular from the detailer supply place that I use (http://www.griotsgarage.com/product/both+glass+polishes.do?sortby=ourPicks if you want to see it) so first tried the fine since I want to remove deposits but not any of the porcelain. The fine took some of the buildup but was really slow so I used some regular and that was much better. It's designed to remove all of the water spots and buildup from your glass without damaging the glass and from my initial test looks to be perfect for porcelain enamel. It took the buildup and left the porcelain alone, which was my intent. I'll do before, in-process, and after photos and post them. I did do one side panel with the fine too and it really made a difference, even though the panel looked really good in the first place. I'll do the rest of the panels and then polish it all with Blue Magic TR-3 Resin Glaze. I use the TR-3 and have yet to find anything better. It also seems to hold up to heat (I use it on the entire engine of show engines) and when I restore old sewing machines it makes them look like new. It'll be interesting to see how it does on the top of my Chambers, especially over the pilot.
|
|
|
|
Post by Rebekah on Jul 27, 2014 9:44:44 GMT -5
Here's another question. The grill lift thumb latch had become bent at some point, losing some of the red whatever-it-is. What is it made out of, and can it be replaced? I thought of mixing fingernail polish with an epoxy or resin of sorts to get a close match, but I'm sure there are better ideas. |
|
|
|
Post by pooka on Jul 27, 2014 14:09:30 GMT -5
mach12, look like your expertise in car restoration will serve you & advise us well on many issues on our stoves. I know on the program called "AMERICAN RESTORATION", someone brought them an old neon & porcelain bank sign from a small town. They didn't want the porcelain redone. They just wanted the neon repaired & cleaned up so it would show it's age. They wanted to put it back up in their small town where it had always been for the town to enjoy & to remind people of their heritage. Anyway, when he was done, the porcelain looks like new. He just said they polished it up. I assume he used something like you're suggesting. bekahmancino, we've always called that cloisonne, but it's really something similar with another name. It's basically a powdered glass made into a thin paste that's applied then baked in an oven to fuse into place. I've found a few sources that redo stuff like old car badges & the like, but it's very expensive. The green thumb latch for the Thermowell on my model 7141 was bashed pretty bad. I sent it to another member who's experimenting with resin, but eventually found a complete replacement set on eBay. Here's what the bashed one looked like when I got it compare to the rest of the set.   And here is what my newer set looks like. 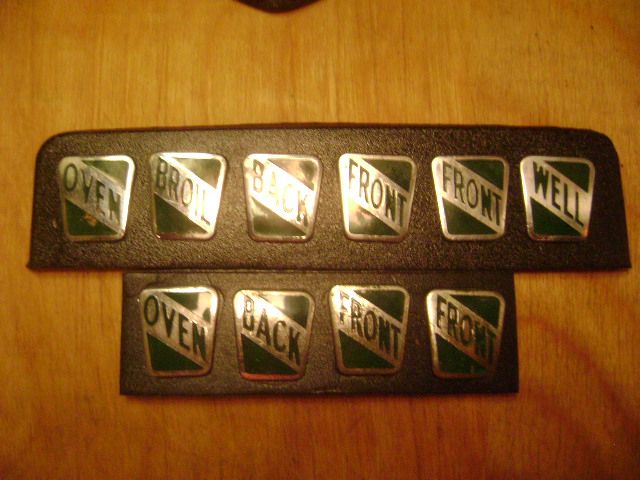 I figured I could get a good complete set between my old ones & the newer set. Keep an eagle eye on eBay & you might get lucky. Fingernail polish might be a good stopgap method on yours for the time being, since it isn't near as bad as mine. |
|
|
|
Post by mach12 on Jul 27, 2014 18:21:58 GMT -5
Several of us have been trying to figure out a resin that will work for the oven knobs and I just ordered a resin for doing taillight repair and duplication. It's supposed to adhere well to metal and handles about 450F.
I've had two different jewelry repair people tell me that the process is called guilloche enamel if the enamel is laid over a tooled design like on the knobs and is champlevé if the surface isn't tooled. Both are vitreous (fired) enamel. That's about all I know. As far as we've come with modern resins, it sure seems there'd be an acceptable product out there.
|
|
|
|
Post by Rebekah on Jul 27, 2014 21:08:56 GMT -5
Sorry if I'm missing something, but why would it need to be so heat resistant?
Spilling boiling water? Hot fat?
|
|
|
|
Post by mach12 on Jul 28, 2014 10:15:10 GMT -5
The heat issue as I understand it has to do with changes in heat over time that cause a material to separate from the surface it's adhered to. Some people have tried materials that they say expand and contract at so much of a different rate compared to the surface it's on that it simply falls off. The Chambers badge on some models is a particular issue since it's affected by burner heat. I also am told that transient heat can warm the oven thermostat knobs (and timer on the C's) to where they're warm to the touch. From what I've been told the temperatures aren't anything that would melt a resin but are still enough to cause expansion and contraction and cause it to lose contact. What is needed is something that will work long-term and that has been a bit elusive so far.
|
|
|
|
Post by Rebekah on Jul 28, 2014 11:19:39 GMT -5
Interesting.
I'll have to pose the question to some ex-colleagues who are in the industrial heating business.
|
|
|
|
Post by vaporvac on Jul 28, 2014 13:03:30 GMT -5
Maybe when dugbug returns from his hiatus he can tell us how his fix has held up. Does anyone on this site correspond with him directly?
|
|
|
|
Post by Chuckie on Jul 28, 2014 13:33:51 GMT -5
Maybe when dugbug returns from his hiatus he can tell us how his fix has held up. Does anyone on this site correspond with him directly? I have his email, and have written him before. Want me to contact him? CHEERS! Chuckie |
|
|
|
Post by vaporvac on Jul 28, 2014 14:37:45 GMT -5
that would be great. let me find the link to his post and you can take it from there. TThanks! Oh heck. search function down on bothe sites! You can just go ahead and email him. I'm sure he'll remember what we're talking about! It looked so good.
|
|
|
|
Post by marka on Jul 28, 2014 18:13:30 GMT -5
I'm working on finding a resin that is tintable and will bond with metal to use as a repair.
I have about 3 types I'm going to try out and I'll report my findings.
|
|
|
|
Post by Chuckie on Jul 28, 2014 22:31:44 GMT -5
that would be great. let me find the link to his post and you can take it from there. TThanks! Oh heck. search function down on bothe sites! You can just go ahead and email him. I'm sure he'll remember what we're talking about! It looked so good. I just emailed him--via our last (Jan 5, 2014) email. Here's part of what he said in that email: " Honestly, I seldom go on the computer since I got my tablet, and on it, I rarely use the Internet.
I've been doing well. Still buying Chambers stoves & fixing them up. I have been restoring the yellow 61C I have and so far, it is turning out great!
I know that I haven't been on the Chambers site much, but again, I'm just not online as much as I used to be. Plus, I noticed that the forum changed some, making it less user friendly IMO. I always enjoyed sharing photos of my projects and sharing info and tips. I will try harder to get back on the site more." End of quote. That was back in January, so perhaps chipper's updates and my email will entice him back... CHEERS! Chuckie |
|
|
|
Post by mach12 on Jul 30, 2014 1:07:42 GMT -5
Interesting. I'll have to pose the question to some ex-colleagues who are in the industrial heating business. Excellent idea! I'll bet someone has already worked it out somewhere. I never thought about the industrial heating business. Sheesh - that's what my brother did. I'll have to pick his brain too.
I'm looking forward to seeing what Marka comes up with too. He has some really good insight and ideas and I wouldn't be surprised if he comes up with something that works well.
|
|
|
|
Post by Rebekah on Aug 5, 2014 8:31:31 GMT -5
Hello, everyone. She's in place!! Yay!! I'm back with another puzzler. I'll let the video do all of the talking, though I apologize as the problem I had wanted to demonstrate got camera-shy and didn't surface until hubby decided to use the stove some minutes later (advance to 5:12). In summary, however, it's to do with the pilot. When the front right burner lights from the pilot, it appears as if there's a leak of gas somewhere on the one side of the tube that ignites as a short-lived puff where the tube inserts into the burner. |
|
|
|
Post by lwagne on Aug 5, 2014 9:14:15 GMT -5
It does look as if you might have a small leak in the right flashtube that leaks, ignites, burns, leaks, etc. Have you tried switching around the flash tubes, keeping in mind which one "leaked" and see if it stays as a leak? The flashtube usually is in two pieces so they have some slip. Maybe you don't have a tight fit where the tubes fit together. There will be other opinions, of course, most better than mine.
The stove looks fabulous in place!!
|
|
|
|
Post by Rebekah on Aug 5, 2014 9:26:15 GMT -5
Thanks, lwagne. I took the tubes out and cleaned them with an abrasive pad - did the same in the hole in the bottom too so as to ensure that the gas flow wasn't impeded. Same thing. They were pretty much 'stuck' in their positions, though I did loosen them somewhat so that their lengths could be adjusted. Basically, I think each tube was 'paired' with the burner, in that they were set and somewhat frozen to the correct lengths to only fit in one place. (Not any more! lol) The strangest part, is that it didn't do that when I was testing in before-hand!!! She does fit in her home perfectly (thanks to hubby, of course ). Not in the least bit out of place. I am so delighted |
|
|
|
Post by Rebekah on Aug 5, 2014 11:41:09 GMT -5
Ok ... I might have found the issue.
Back to burner adjusting, rather than pilot and flash-tube adjusting.
I noticed that the three ports up the inner-most burner posts weren't all lit.
Opening and closing the air adjuster also controlled the number of the ports which were lit.
I had mentioned previously that having too much airflow could effectively blow out the flame from inside - well, seems that perhaps that was some of the problem.
Not only were flames on the ports not constant, but (and this is just a theory) the excess air was flowing down the tube towards the pilot, preventing the flash-back which would light the burner.
In the case of the front-right burner, the recurring puff was indeed a temporary build-up of gas.
By readjusting the burner to reduce airflow, the puff went away.
I did take the opportunity to fully disassemble the flash tubes - including the air adjuster sleeve.
They were difficult to release as they'd somewhat rusted in place (temporarily, thankfully!).
All three burners are lighting with the pilot, though it does take a little while for them to ignite.
Do your burners light instantly?
|
|
|
|
Post by vaporvac on Aug 5, 2014 13:43:35 GMT -5
It looks beautiful. I only have the pilot on my Twell, but it lights almost immediately.
|
|
|
|
Post by Chuckie on Aug 5, 2014 17:55:02 GMT -5
Ok ... I might have found the issue. Back to burner adjusting, rather than pilot and flash-tube adjusting. I had like THREE F'ING PARAGRAPHS written about my thoughts on the subject. While trying to "italicize" ONE word by clicking on the "I" on the format line, a GD GIANT "I" came up on the screen, and that was ALL!!!!!!!!!!!!!!!! When I went BACK, all was lost!!!!!!!!!!!!! SHIT, IF I get over being pissed, I'll try again!!!!!!!!!!!!!!! And that is not the FIRST TIME that crap has happened to me since the "NEW AND IMPROVED SITE" came along!!!!!!!!!!!!!!!!!!!!!!!!!!!!!!!!!!!!! IF I use "Control B" for bold or "Control I" for italics, all is well. BUT if I use the FORUM buttons-------GRRRRRRRRRRRRRRRRRRRRRRRRRRRRRRRRRRRRRRRRRRRRRRRRRRRRRRRRRRRRRRRRRRRRRRRRRR!!!!!!!!!!!!!!!!!! Sorry for the language, BUT--at the risk of repeating & re-cursing, it PISSES ME OFF!!!! And-- AGAIN--this has happened for like the last THREE times I tried to post. I'm like what pooka, said about his typing abilities, it sometimes takes me awhile TO post, and to lose it half way, welllllllllllllllllllllllllllllllllllllllllllllllllllllllllllllllllllllllllllllll!!!!!!!!!!!!!!!!!!!!!!!!!!!!!!!!!! Wish I had just given up--guess that's what I need to do!! Or quit adding emphasis so the friggin' FORUM GODS don't have to sacrifice another post!!!!!!!!!!!!!!!! JEEZE!!! Chuckie |
|
|
|
Post by lwagne on Aug 5, 2014 19:28:52 GMT -5
And Chuckie, you had WHAT to say about the subject at hand??
My burners do not light instantly. The stove on propane is slower, probably because the propane had probably sunk down somewhere and takes time to come back.
Sometimes, as people have said, I have to blow across the burner or turn it off and on again. Go figure, there IS a reason. They are fickle old girls (some boys:))
|
|
|
|
Post by pooka on Aug 5, 2014 19:34:54 GMT -5
Chuckie , that must have been what happened to me too. I was about half way though a post & looked up & saw a generic page from my web provider. I backed up one screen & my post was gone.
I'll try abbreviate what I was trying to post.
My little stove has the same three piece flash tubes. I think they are a little more finicky to get adjusted just so. All later stoves have two piece flash tubes. Mine are pretty much fused with rust like yours Rebekah. I did manage to get two of the four apart, but I almost damaged them in the process. They really need to soak in penetrating oil to loosen them up so I can get them apart for a proper wire brushing. They could use being re-nicked, but they're made so lightly I don't know if they would withstand the polishing process before re-plating. I left the back two off & match light them as needed. I just dropped I flat head screw in the hole in the burner, so I wouldn't have a big flame coming out of that hole. The front two work sometimes & sometimes not. I just keep a grill lighter on hand to manually light them if I need to.
The burners naturally light a little slowly because it takes a moment for the gas to build up & travel down the flash tube & back to the burner. One trick I read in one of the manuals that it will light better is, if you have a pan sitting over the burner when lighting, this keeps the gas from dispersing so they light a bit better. Natural gas is at such a low pressure, it doesn't take much of a breeze to disrupt it.
I've heard others have had trouble with their later two piece flash tubes too, so I guess they're all a little persnickety at times. Some like vaporvac turn their pilot light off & match light as a rule. I remember the TV show "The Frugal Gourmet" with Jeff Smith. He always used a stove lighter to light his gas stove. They probably did it because they didn't want to leave the pilot light lit for safety reasons on the set.
OK, that my short post. I always seem to end up posting far longer posts that I thought I would. I just ramble on & on.
Lastly, I want to congratulate you on your instal. It looks great. I like how the counter wraps around the back of the stove too. Usually the counter is cut all the way back to the wall for modern stoves. That ledge you left in the back keeps thing from falling behind the range as easily.
|
|
|
|
Post by Rebekah on Aug 5, 2014 20:34:53 GMT -5
ctrl+c ... ctrl+v ... ctrl+z ... My favourite shortcuts. (copy, paste, and undo, respectively; in case anyone reading this doesn't know) Sometimes, I've not had the ctrl down all the way when making something bold or italic viz shortcuts, and overwritten all of my text with a b or an i ... ctrl+z undoes it. It's not a guarantee, but it has got me out of a few pickles. I'm glad to hear that it the burners don't necessarily light automatically. Makes me feel a LOT better. If I were to turn up the gas to the pilot or open the gas orifices, I could get a faster light ... but it'd also mean that my high flames would be way too full. That's ok for me ... but when family stay and use the stove, I don't want to have to have a Chambers 10 Commandments pinned to the side. I slipped a flat-head under the air adjuster sleeve on the tube where it flares at the end, and then used a paring knife to release the edge - it took some fiddling, but I'm sure I got off lightly compared to the state of some. Adjusting the length was as 'easy' as holding the burner end in my hands, and smacking the pilot end into a folded dishcloth on the counter. I've got to say though, I didn't notice a bit of difference to anything when adjusting the air sleeve. Shrug. I'm still undecided on whether I'll leave the pilot on or not. I ferment milk and water kefir ... and having the warmed surface will be a HUGE plus in the winter months. I'd at least like to conquer the issue at hand, and possibly turn the pilot off out of desire rather than necessity. Hubby did a terrific job changing the area from fitting a small regular stove. We designed (and he built) the kitchen from scratch. Nothing's modular. (Did I write that already?). Anyway, we wanted to have a 3ft deep work surface around the stove, because nothing was more frustrating in our former house, than funding that the work surface was taken up with blenders, juicers, cutting boards, food... etc (all notably missing from the picture taken freshly after the install! Hah!). It's a waste of time to constantly pull out/put away the stuff that you use all of the time (as least in our minds). We have a VERY busy kitchen. Some space was lost behind the stove, but my bread bin fits, as does the spice carousel. We also gained some space (incredible, I know!) because of the cover on the stove. When I'm baking now, I actually find that I have MORE space than I had with the old stove, because I can put dishes on the cover. It's a great transformation. ... and what do you know ... seems that Chambers has made for a slightly more organized kitchen!  |
|
|
|
Post by marka on Aug 5, 2014 20:48:51 GMT -5
She looks fantastic!
I will never get over how, even after 60-70 years these stove always look like they belong! Doesn't matter what 'style' your kitchen is, the Chambers looks like it belongs.
Don't worry about the pilot, your burners take a second to light and after a week or so, you'll stop checking to see if the pilot is still lite!
Having the piolt doesn't heat up your space or use much gas so I vote to leave it on.
I do and have no problems at all.
|
|